install librenms on ubuntu 22.04
기존에
https://algo79.tistory.com/848
libreNMS install for Ubuntu 20.04
https://docs.librenms.org/Installation/Install-LibreNMS/ Install LibreNMS - LibreNMS Docs vi /etc/nginx/conf.d/librenms.conf Add the following config, edit server_name as required: server { listen 80; server_name librenms.example.com; root /opt/librenms/ht
algo79.tistory.com
ubuntu 20.04 에서 설치한게 있는데 업그레이드 하려 했지만 원활하지 않아서 ubuntu 22.04 에 설치를 다시 진행했다.
librenms 21버전은 php 7.x 에서 구동이 됐는데 최신 버전 24버전은 php 8.x 에 구동이 되서 업그레이드시 문제가 발생 한다. 디버깅 하기 귀찮아서 그냥 새로 설치를 했다.
# lsb_release -a
No LSB modules are available.
Distributor ID: Ubuntu
Description: Ubuntu 22.04.3 LTS
Release: 22.04
Codename: jammy
설치 환경은 ubuntu 22.04 3 LTS 이다.
# apt install software-properties-common -y
# add-apt-repository universe
# apt update
# apt install acl curl composer fping git graphviz imagemagick mtr-tiny nmap php-{cli,curl,gd,json,mbstring,mysql,snmp,xml,zip} rrdtool snmp snmpd whois python3-{memcache,mysqldb,pip}
# apt install php8.1-fpm
# apt install nginx
이렇게 하면 필요 패키지들이 거의 대부분 설치가 된다.
# vi /etc/php/8.1/cli/php.ini
# vi /etc/php/8.1/fpm/php.ini
php 시간 변경

date.timezone = Asia/Seoul

www 는 librenms
user = librenms, group = librenms
로 변경
listen = /run/php/php8.1-fpm.sock
listen = /run/php/librenms.sock 로 변경
mysql 설치
# apt install mariadb-server
# mysql
mysql
mysql> CREATE DATABASE librenms;
mysql> GRANT ALL on librenms.* to librenms@localhost identified by 'password12345';
mysql> FLUSH PRIVILEGES;
db 생성
# vi /etc/mysql/mariadb.conf.d/50-server.cnf

[mysqld] 항목 아래에
sql_mode = ""
innodb_file_per_table=1
lower_case_table_names=0
추가
# service mariadb restart
서비스 재시작
librenms git에서 다운

# cd /opt
#git clone https://github.com/librenms/librenms.git librenms
# chown -R librenms: /opt/librenms
# chmod 771 /opt/librenms
# setfacl -d -m g::rwx /opt/librenms/rrd /opt/librenms/logs /opt/librenms/bootstrap/cache/ /opt/librenms/storage/
# setfacl -R -m g::rwx /opt/librenms/rrd /opt/librenms/logs /opt/librenms/bootstrap/cache/ /opt/librenms/storage/

# vi /etc/nginx/conf.d/librenms.conf
server {
listen 80;
server_name librenms.yourdomain.com;
root /opt/librenms/html;
index index.php;
charset utf-8;
gzip on;
gzip_types text/css application/javascript text/javascript application/x-javascript image/svg+xml text/plain text/xsd text/xsl text/xml image/x-icon;
location / {
try_files $uri $uri/ /index.php?$query_string;
}
location ~ [^/]\.php(/|$) {
fastcgi_pass unix:/run/php/librenms.sock;
fastcgi_split_path_info ^(.+\.php)(/.+)$;
include fastcgi.conf;
}
location ~ /\.(?!well-known).* {
deny all;
}
}
위 내용 저장하고 저장 빨간 글시는 내 도메인으로 하던가 아니면 ip 로 해야 한다.
그리고 서비스 재시작
# service nginx restart
브라우저에서 /etc/nginx/conf.d/librenms.conf 에 입력했던 server_name 입력해서 접속
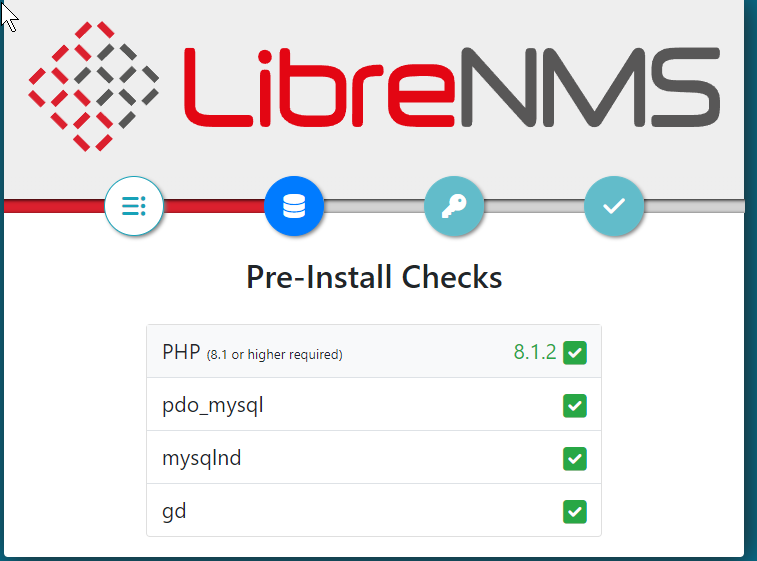
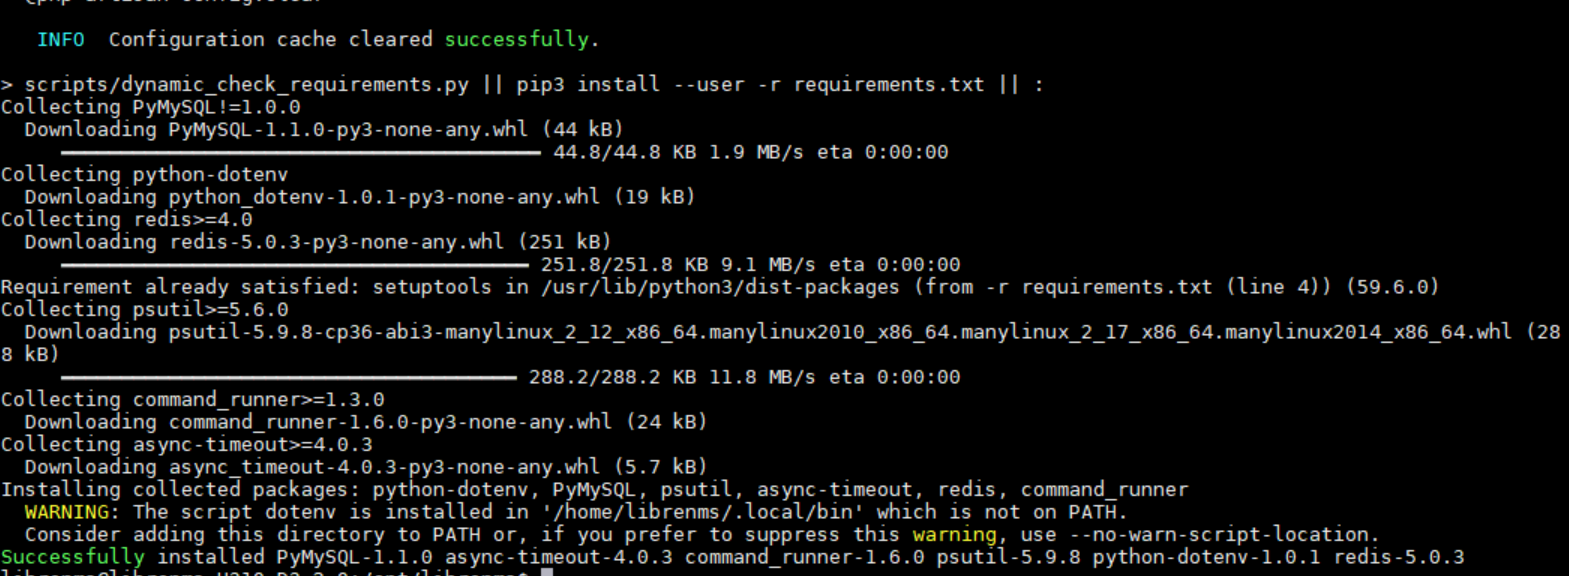
필요 패키지 처음에 다 설치 했으니 문제 없이 패스
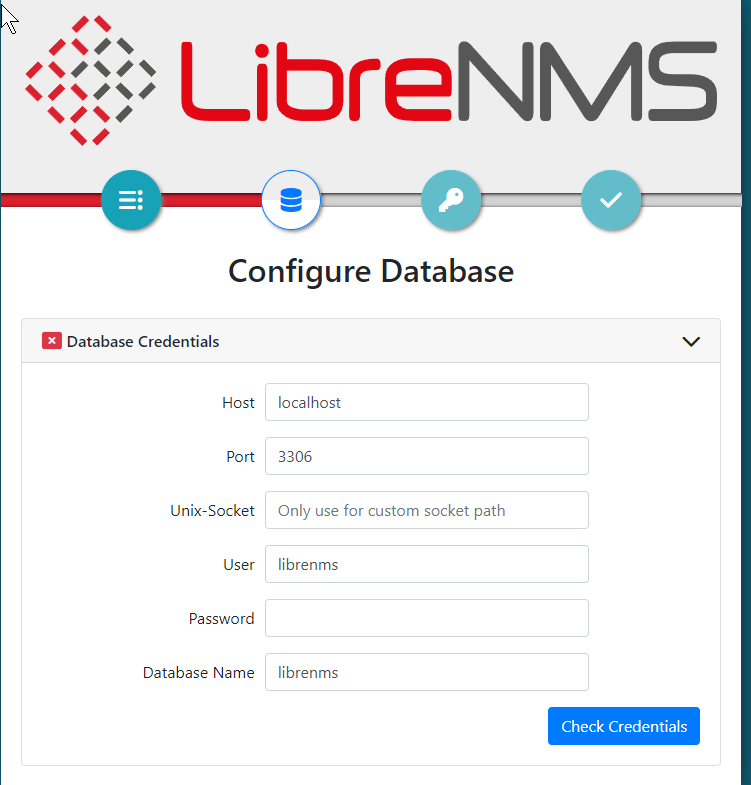

아까 db 입력했던 정보 넣고 build database 누르고 기다리면

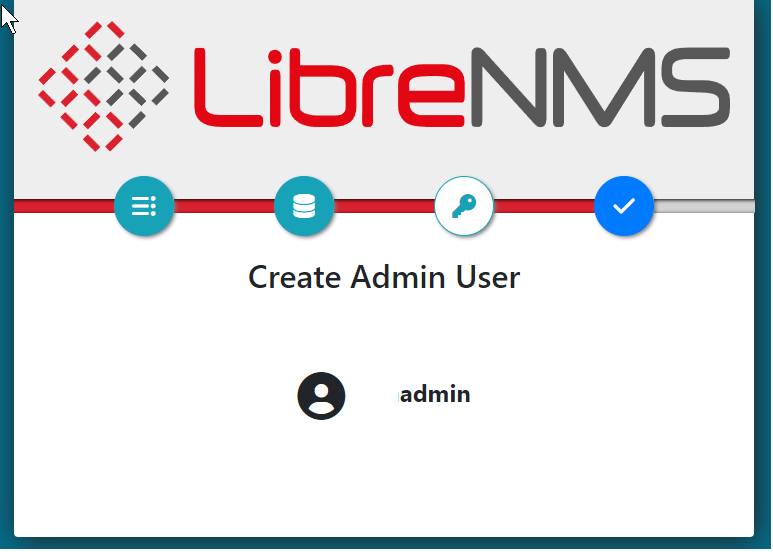
완료 되고 계정 정보 입력
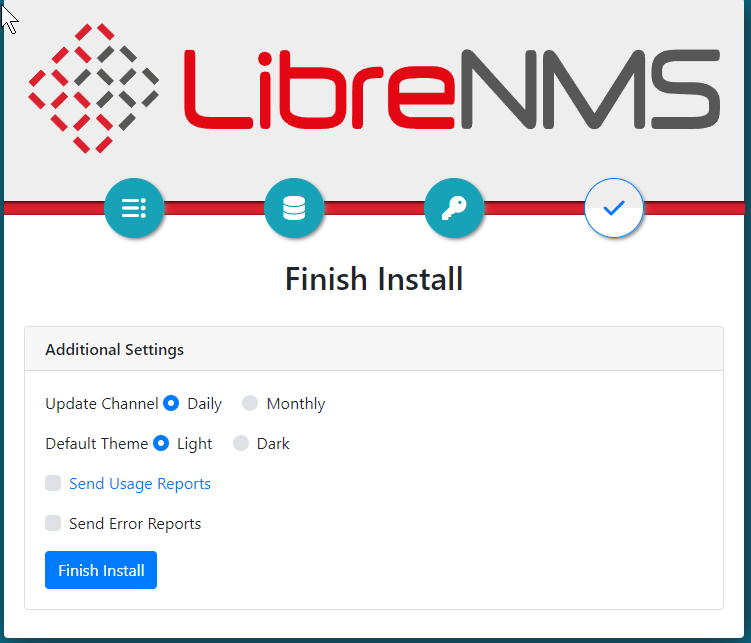

그럼 끝

로그인 하면
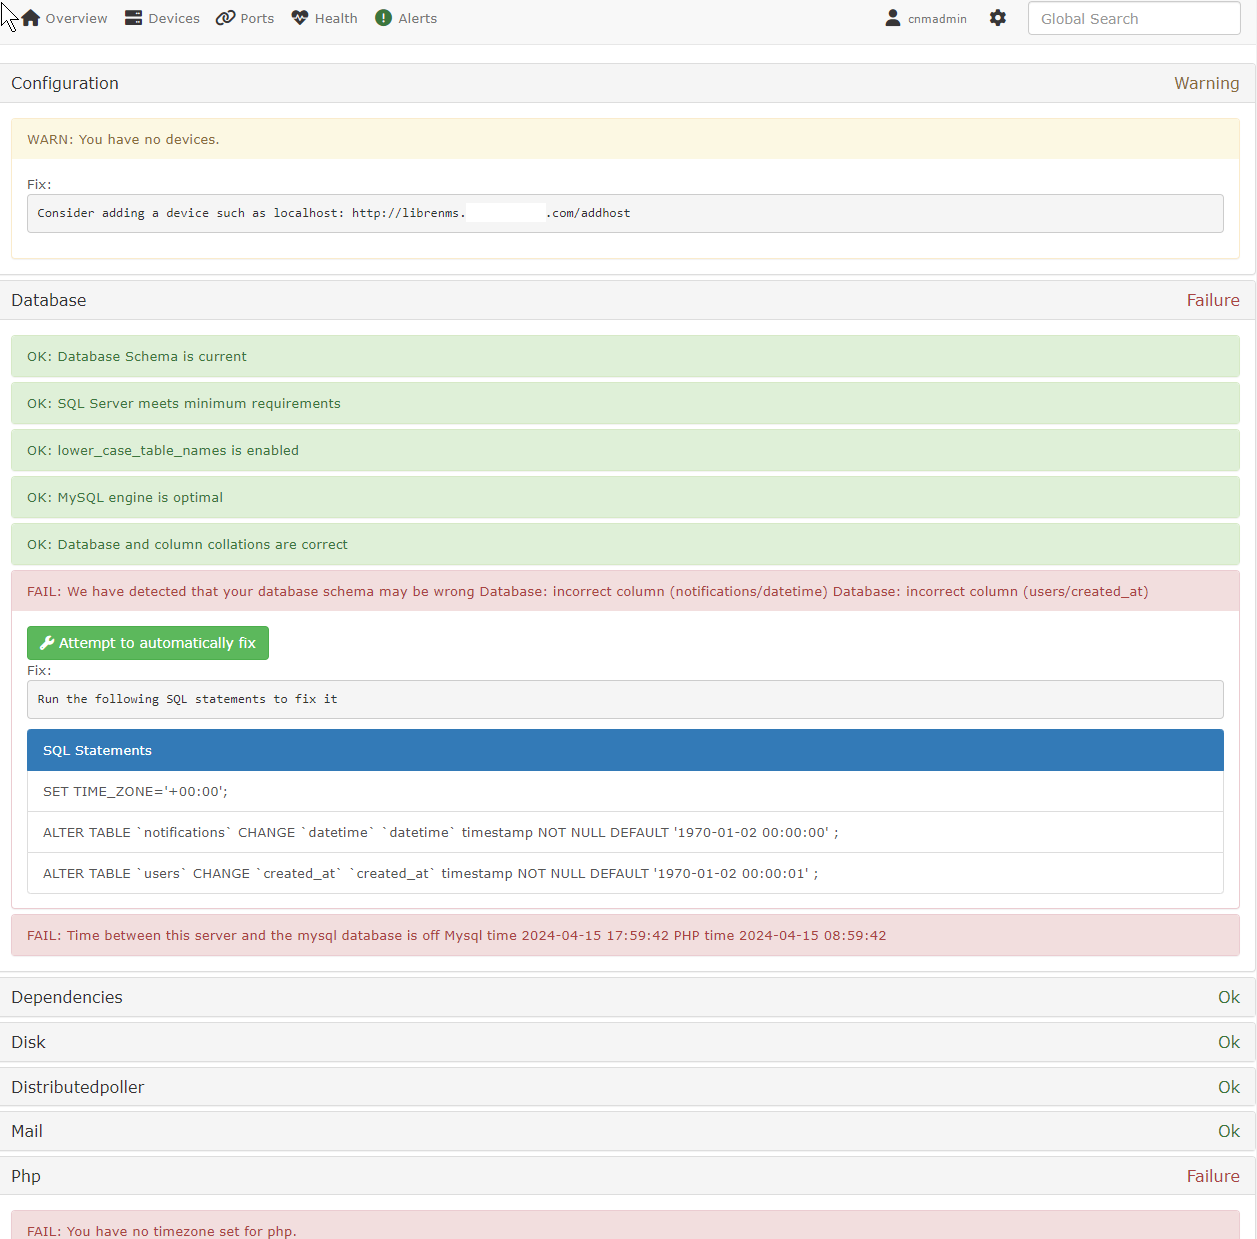
이렇게 뜨는데 문제 있는 부분은 친절하게 하는 방법이 나와 있으니 해주면 된다.
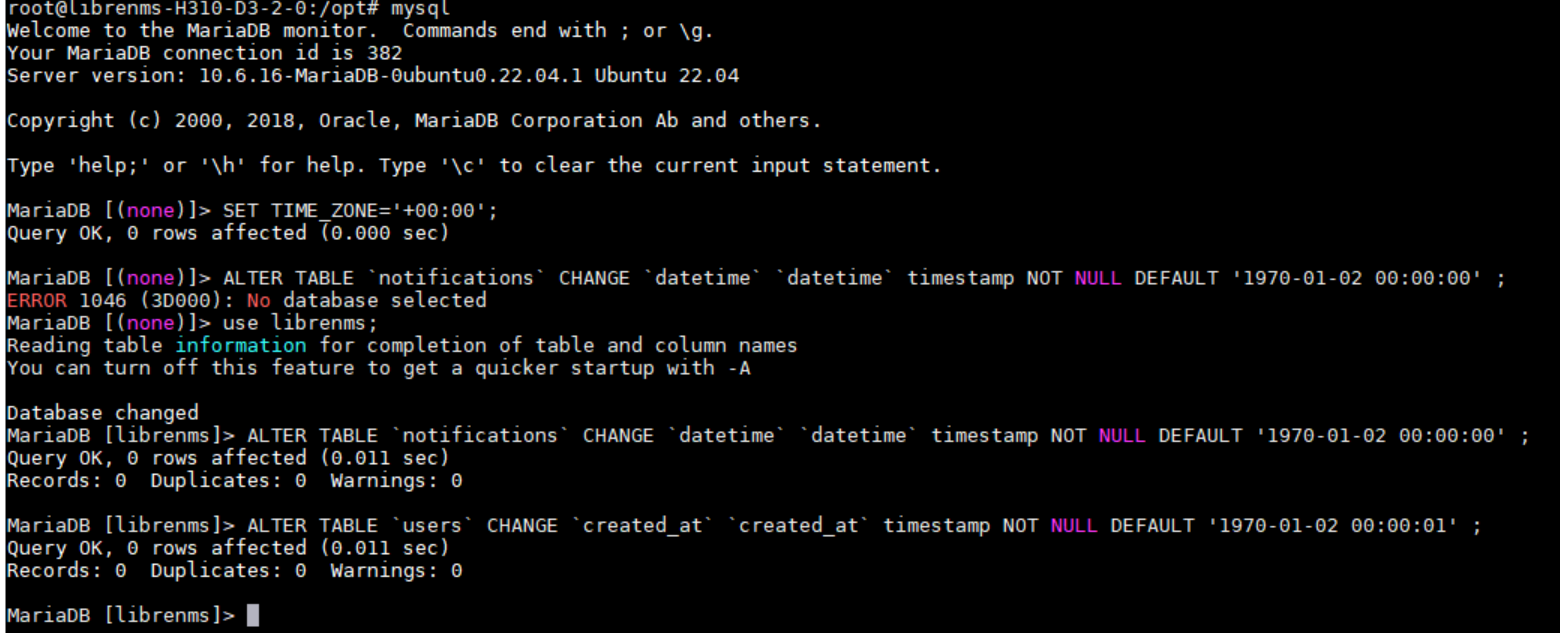
가이드대로 mysql 들어가서 변경해주고
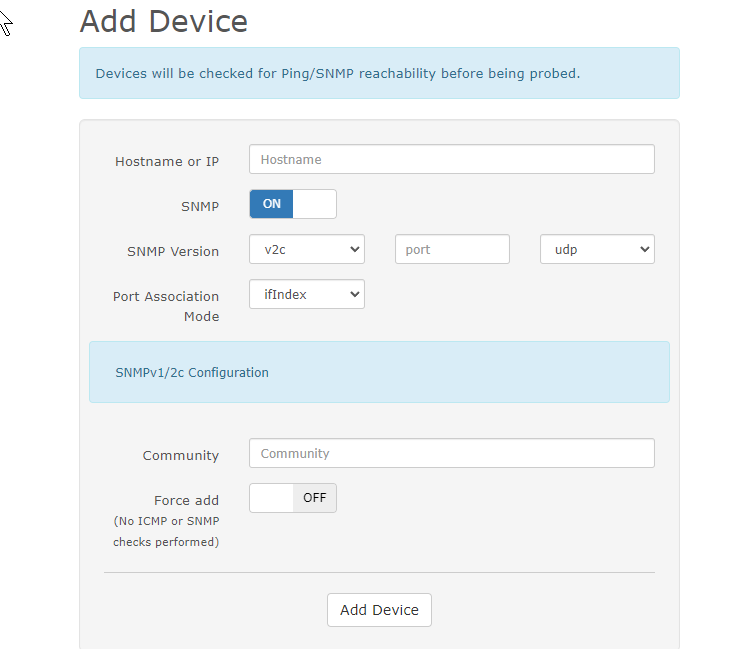
device 등록해주면

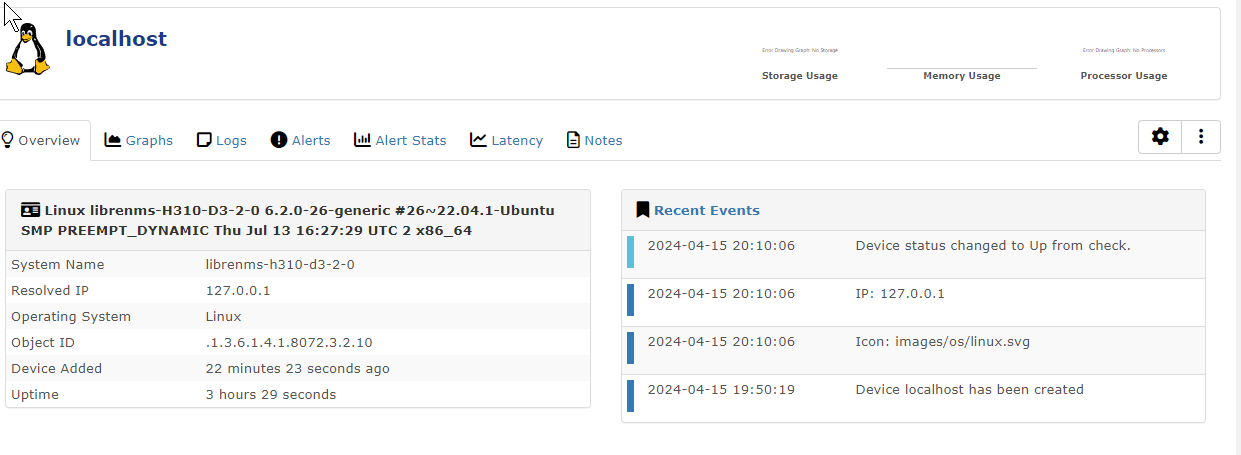

정상적으로 잘 나온다.